How to Use curl for Web Development and SEO
curl is a free program that allows you to make web requests from the terminal.
It’s a useful tool for downloading text from the Web, or checking HTTP headers while debugging a site, or finding out what bots are seeing when they crawl the site. For example, if you’re working on SEO and want to see some of the hidden information that Googlebot sees, curl is a useful tool.
What This Tutorial Covers
This tutorial covers a few ways to use curl in Web development or SEO tasks, including:
- How to quickly download webpages to save the raw HTML.
- How to extract HTTP headers and follow redirects to take a quick look at what Googlebot sees when it visits a URL.
- How to download JSON from APIs and print it in a human-readable form to inspect or extract data.
- How to search through a page’s raw HTML for text, for example, to monitor a page for the addition or removal of a link or phrase.
- An example of how to automate these kinds of tasks for many pages at a time.
How to Install curl
If you’re using Linux or Mac, curl might already be installed.
To check, open up a terminal and type the word curl at the prompt. If it’s installed, you should see a message like this:
curl: try 'curl --help' or 'curl --manual' for more informationIf curl isn’t installed, you can get it with a package manager like Homebrew on Mac, apt-get on Ubuntu Linux, WSL on Windows, or directly from the website.
After it’s installed, you can move on to the next section.
A Note about Using the Terminal
All of the curl commands are run by typing them in a terminal. If you haven’t used the terminal before, you basically just type messages to the computer telling it what you want it to do, and the computer will print out the results of the commands.
One of the advantages of using the terminal for these kinds of tasks is that it allows you to automate things with scripts. This tutorial won’t go deep into shell scripting, but there’s a quick example at the end.
Fetching Pages with curl
In the most basic usage of curl, you can download the raw HTML source for a webpage to see what it looks like without being modified by JavaScript or CSS.
For that purpose, run the command like this, replacing <url> with the URL of the page that you want to fetch:
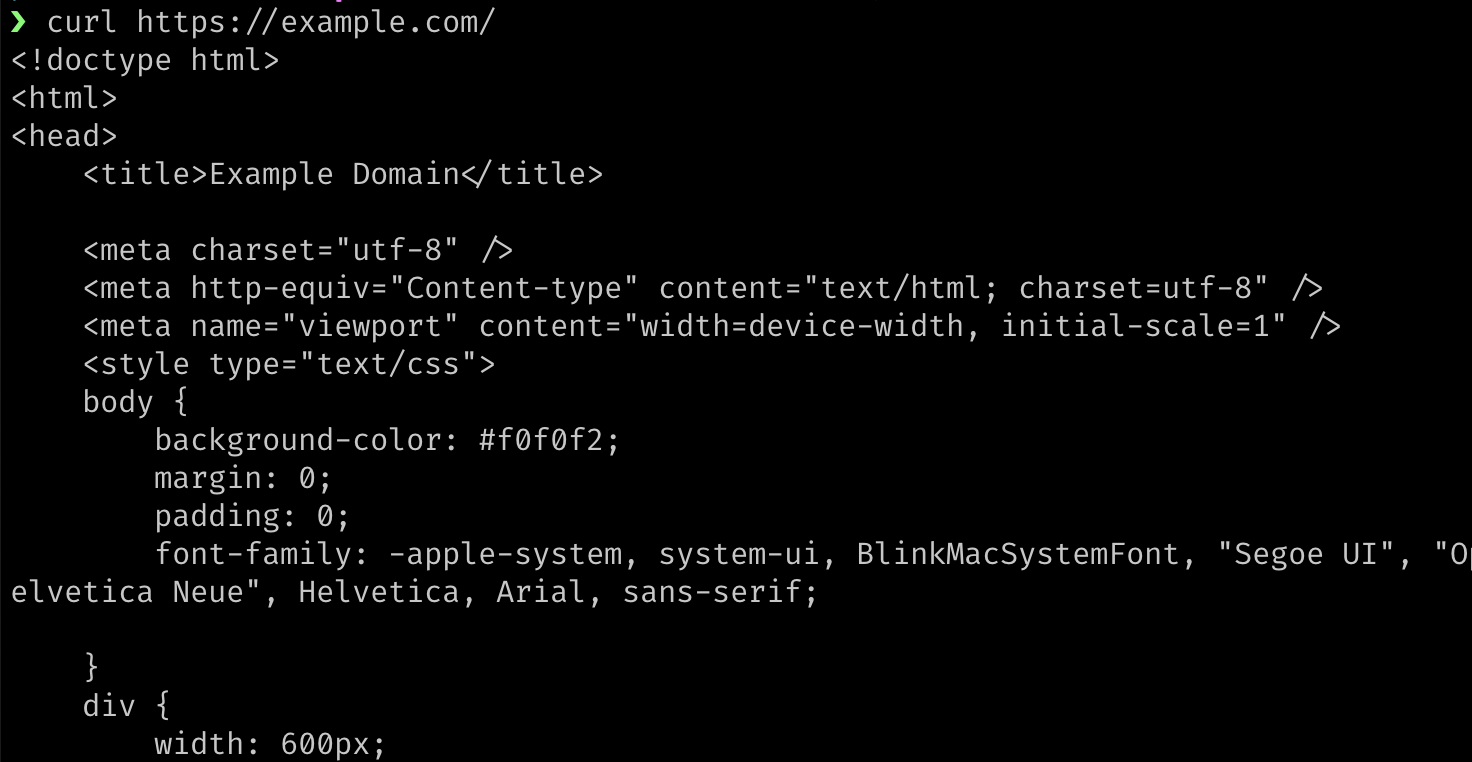
curl <url>For example, if you type curl https://example.com/ in a terminal, it will print out the HTML source code for that URL:
If you want to save the output, you can direct the output into a file with the > symbol and a filename like this:
curl https://example.com/ > output-file.htmlAnother way to save the response is to use the -o flag, which is useful if the content type is a filetype that isn’t text-based:
curl https://placekitten.com/500/500 -o kitten.jpgIf the URL already has a filename on it, you can use the -O (capital o) flag to save it with its original filename like this, which will save the image as enwiki.png:
curl -O https://en.wikipedia.org/static/images/project-logos/enwiki.pngViewing HTTP Headers with curl
HTTP headers are bits of text that are sent between Web clients and Web servers.
(A Web client is a program that makes HTTP requests to a Web server. Examples of Web clients are Firefox, Chrome, and curl.)
The HTTP headers include information like status codes (e.g., 200, 301, 302, 404), which control redirects and other browser behavior.
One way to view HTTP headers with curl is to use verbose mode, which can be turned on by including -v after the word curl. (Command modifiers like -v are called “flags”.) Remember to replace <url> with a real URL.
curl -v <url>Here’s a full, working example:
curl -v https://example.com/The terminal will print out a bunch of lines that begin with an asterisk like this, which are safe to ignore, unless you are interested in low-level networking information:
*   Trying 93.184.216.34:443...
* Connected to example.com (93.184.216.34) port 443 (#0)
* ALPN, offering h2
* ALPN, offering http/1.1
* successfully set certificate verify locations:
*  CAfile: /etc/ssl/cert.pem
*  CApath: none
* (304) (OUT), TLS handshake, Client hello (1):
* (304) (IN), TLS handshake, Server hello (2):
* (304) (OUT), TLS handshake, Client hello (1):
* (304) (IN), TLS handshake, Server hello (2):
* (304) (IN), TLS handshake, Unknown (8):
* (304) (IN), TLS handshake, Certificate (11):
* (304) (IN), TLS handshake, CERT verify (15):
* (304) (IN), TLS handshake, Finished (20):
* (304) (OUT), TLS handshake, Finished (20):
* SSL connection using TLSv1.3 / AEAD-AES256-GCM-SHA384
* ALPN, server accepted to use h2
* ...
Below the lines that start with an asterisk are lines that start with a greater than sign (>). They are the request headers, meaning that they are sent from curl to the remote server for the given URL (https://example.com/). Web browsers also send these kinds of headers whenever they visit a webpage, though browser generally include additional headers by default.
> GET / HTTP/2
> Host: example.com
> user-agent: curl/7.79.1
> accept: */*
>
Basically, that means GET the root path (/) of the domain example.com using version 2 of the HTTP protocol. The request headers also tell the server that the user-agent is curl. The accept header tells the server that it’s okay to send back any kind of content, whether it’s plain text, HTML, CSS, JavaScript, JSON, a PDF file, an image, or something else.
All Web clients send these kinds of request headers. A browser would tell the server which type of browser it is, like Firefox or Chrome. Googlebot would put information in the user-agent header to tell the server that it’s Googlebot. Instead of curl/7.79.1, Googlebot would send a user-agent header something like this to identify itself:
Mozilla/5.0 (Linux; Android 6.0.1; Nexus 5X Build/MMB29P) AppleWebKit/537.36 (KHTML, like Gecko) Chrome/W.X.Y.Z Mobile Safari/537.36 (compatible; Googlebot/2.1; +http://www.google.com/bot.html)Below the lines that begin with a > symbol are lines that begin with a < symbol. Those are the response headers that the server sends back to the client.
< HTTP/2 200
< accept-ranges: bytes
< age: 347118
< cache-control: max-age=604800
< content-type: text/html; charset=UTF-8
< date: Mon, 03 Oct 2022 22:04:03 GMT
< etag: "3417536981"
< expires: Mon, 10 Oct 2022 22:04:03 GMT
< last-modified: Thu, 17 Oct 2019 07:18:26 GMT
< server: ECS (oxr/8313)
< vary: Accept-Encoding
< x-cache: HIT
< content-length: 1256
<
The first line contains the number 200, which is the status code meaning OK. Some other common status codes are 404 (not found), 301 (permanent redirect), and 500 (internal server error). That first line of text in the response headers is where browsers (and other Web clients, like curl) find the status code.
The other headers contain information for the Web client that help it perform various tasks. For example, the content-type header tells the browser how to render the page. In this case, the server is telling the browser that it’s sending HTML:
content-type: text/html; charset=UTF-8Below the response headers will be the body of the response that was sent back for that URL. It will be HTML in this case.
How to Fetch Only the Headers with curl
If you’re only interested in the headers, and you don’t want to see the HTML body or all of that networking information that we ignored in the example above, you can use an alternate form of the command by adding -I (uppercase i).
curl -I https://example.com/That will give you simple output like this, which is easier to read if you’re only looking for the response headers:
HTTP/2 200
content-encoding: gzip
accept-ranges: bytes
age: 567720
cache-control: max-age=604800
content-type: text/html; charset=UTF-8
date: Mon, 03 Oct 2022 23:42:12 GMT
etag: "3493072831"
expires: Mon, 10 Oct 2022 23:42:12 GMT
last-modified: Thu, 17 Oct 2019 07:18:26 GMT
server: ECS (oxr/8379)
x-cache: HIT
content-length: 648
There is one major problem with curl -I though.
A problem with curl -I is that it doesn’t do a normal GET request — it does a HEAD request.
Here’s what MDN says about that:
The HTTP
HEADmethod requests the headers that would be returned if theHEADrequest’s URL was instead requested with the HTTPGETmethod.For example, if a URL might produce a large download, a
HEADrequest could read its Content-Length header to check the filesize without actually downloading the file.
So a Web server should return just the headers for a HEAD request in the same way that it would for a GET request, but in reality not all servers behave correctly, and I’ve run into sites where HEAD requests don’t send the correct response. The Web developer might have limited a route to only respond to GET requests and nothing else.
To deal with that problem, there’s actually a better way to view the headers, but it involves a little more typing.
First, I’ll show the version that requires more typing, and then I’ll show an easy way to avoid the extra typing.
Better curl headers
Here’s the command that will perform a real GET request, print out the headers, and follow any redirects in order to give you a full report of what is happening:
curl -sSL -D - <url> -o /dev/nullReplace <url> with an actual URL. Here’s a working version:
curl -sSL -D - http://example.com/ -o /dev/null(The flags will be explained below after discussing a few other things.)
Instead of typing that out each time, you can put it in a bash/shell function like this:
headers () {
    curl -sSL -D - "$1" -o /dev/null
}
That function lets you run the longer version of the curl command by just typing headers. The $1 in the code means that the first thing after the headers command will be injected into the code inside the function.
So now all you have to type is this:
headers https://example.com/But there’s one more problem!
The problem is that some websites serve different content to bots, and they might consider requests with a user-agent header of “curl” to be a bot. So if you make a request like this with curl, you might see different output than if you made the request with a regular Web browser.
To make the request look more like a browser you can add request headers by using the -H flag. Each header that you want to add gets prefixed with -H.
In this next version, I’ve added three headers. The user-agent says that the client is Firefox version 105 on Windows 10. The other two headers are usually sent by browsers, so I added those as well. (The backslashes are there to escape the newline so that the code is run as if it were all on one line, while still keeping it readable.)
headers () {
    curl -sSL -D - "$1" -o /dev/null \
        -H 'User-Agent: Mozilla/5.0 (Windows NT 10.0; Win64; x64; rv:97.0) Gecko/20100101 Firefox/105.0' \
        -H 'Accept: text/html,application/xhtml+xml,application/xml;q=0.9,image/avif,image/webp,*/*;q=0.8' \
        -H 'Accept-Language: en-US,en;q=0.5'
}
That code should go in your shell configuration file, like ~/.zshrc or ~/.bashrc. After you add the function to the config file, restart your terminal, and the new headers command will always be available.
If you don’t have a shell configuration file or don’t know how to find it, you can paste the function right in the terminal, and it will be available until you close the terminal.
Now the function will work for most sites, and you can run it on any URL from the terminal like this:
headers https://example.com/You can test it on redirects like this:
headers http://google.com/In that example, I used an HTTP URL there instead of HTTPS, because Google will redirect to the HTTPS version. Google will also perform a redirect to add “www” to the URL. Below is the output (with a few things removed). Each block of text contains the response headers for one HTTP request, so there are three requests in total.
Here’s the output of the above command:
HTTP/1.1 301 Moved Permanently
Location: http://www.google.com/
Content-Type: text/html; charset=UTF-8
Date: Tue, 04 Oct 2022 00:29:09 GMT
Expires: Thu, 03 Nov 2022 00:29:09 GMT
Cache-Control: public, max-age=2592000
Server: gws
Content-Length: 219
X-XSS-Protection: 0
X-Frame-Options: SAMEORIGIN

HTTP/1.1 302 Found
Location: https://www.google.com/?gws_rd=ssl
Cache-Control: private
Content-Type: text/html; charset=UTF-8
Date: Tue, 04 Oct 2022 00:01:12 GMT
Server: gws
Content-Length: 231
X-XSS-Protection: 0
X-Frame-Options: SAMEORIGIN
Set-Cookie: <some cookie data>
Set-Cookie: <some cookie data>

HTTP/2 200
date: Tue, 04 Oct 2022 00:01:12 GMT
expires: -1
cache-control: private, max-age=0
content-type: text/html; charset=UTF-8
strict-transport-security: max-age=31536000
p3p: CP="This is not a P3P policy! See g.co/p3phelp for more info."
server: gws
x-xss-protection: 0
x-frame-options: SAMEORIGIN
set-cookie: <some cookie data>
set-cookie: <some cookie data>
set-cookie: <some cookie data>
alt-svc: <some data>
accept-ranges: none
vary: Accept-Encoding
Each block of headers represents one HTTP request.
The first one sends a 301 header, which means “permanent redirect”. The Location header tells the client where to redirect to:
Location: http://www.google.com/So in that first redirect, it added the “www”.
Then it does a 302 (temporary) redirect to the HTTPS version:
Location: https://www.google.com/?gws_rd=sslThe part of the URL that says ?gws_rd=ssl probably tells Google that the visitor arrived on that page via a redirect to the SSL (HTTPS) version of the URL from the HTTP version. I’m guessing that “gws” refers to the server type mentioned in the response headers (Google Web Server), and “rd” is probably an abbreviation for “redirect”.
An Explanation of the Longer curl Command
Here’s a detailed explanation of how the longer curl function works.
First, here’s the command for reference:
curl -sSL -D - http://example.com/ -o /dev/nullHere are what the flags mean:
-Dmeans dump the headers.-osends the output (response body) into/dev/null(meaning that it discards it).-smeans “silent” (hide some unneeded output).-Smeans show errors, even when-sis used.-Lmeans follow redirects.
You can mix and match different flags to get the result that you want.
For example, if you don’t want it to follow redirects, try removing the L flag like this:
curl -sS -D - http://google.com/ -o /dev/nulland you’ll see only one set of headers, because curl won’t follow the redirects:
HTTP/1.1 301 Moved Permanently
Location: http://www.google.com/
Content-Type: text/html; charset=UTF-8
Date: Tue, 04 Oct 2022 01:21:55 GMT
Expires: Thu, 03 Nov 2022 01:21:55 GMT
Cache-Control: public, max-age=2592000
Server: gws
Content-Length: 219
X-XSS-Protection: 0
X-Frame-Options: SAMEORIGINFetching JSON with curl
Another useful thing you can do with curl is fetch JSON.
JSON is a simple data format that is commonly used to send data back and forth between browsers and servers. If you’re dealing with a Web API, chances are that it’s using JSON to transfer its data.
JSON data is made up of key-value pairs that look like this:
{
  "name": "Frodo",
  "age": 33,
  "species": "hobbit",
  "equipment": ["mithril shirt", "sword", "ring"]
}
To practice using curl to fetch JSON, make a request to dummyjson.com with this command:
curl https://dummyjson.com/products/1It works, but notice that the JSON is a dense mess that is difficult to read:
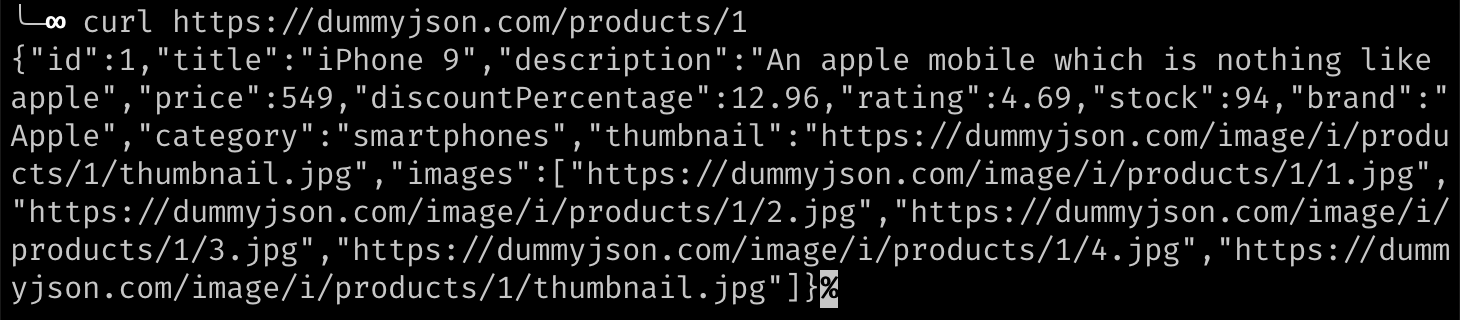
Piping curl Output into Other Commands
One of the great things about using a terminal is that you can pipe the output of one command into other commands. That means that you can send the output of curl into another program that can format the JSON and make it more readable.
The tool I use for that is called jq. (Learn how to install it on their website.)
To format the JSON, run the same curl command, this time adding -s (for “silent”) to keep it from printing out a progress bar. Also add a pipe character (|), which means: send the output of the command before the pipe into the command that follows the pipe. The command after the pipe will be jq "." which prints out the JSON it receives in a human-friendly form.
Here is the full command:
curl -s https://dummyjson.com/products/1 | jq "."and the output:
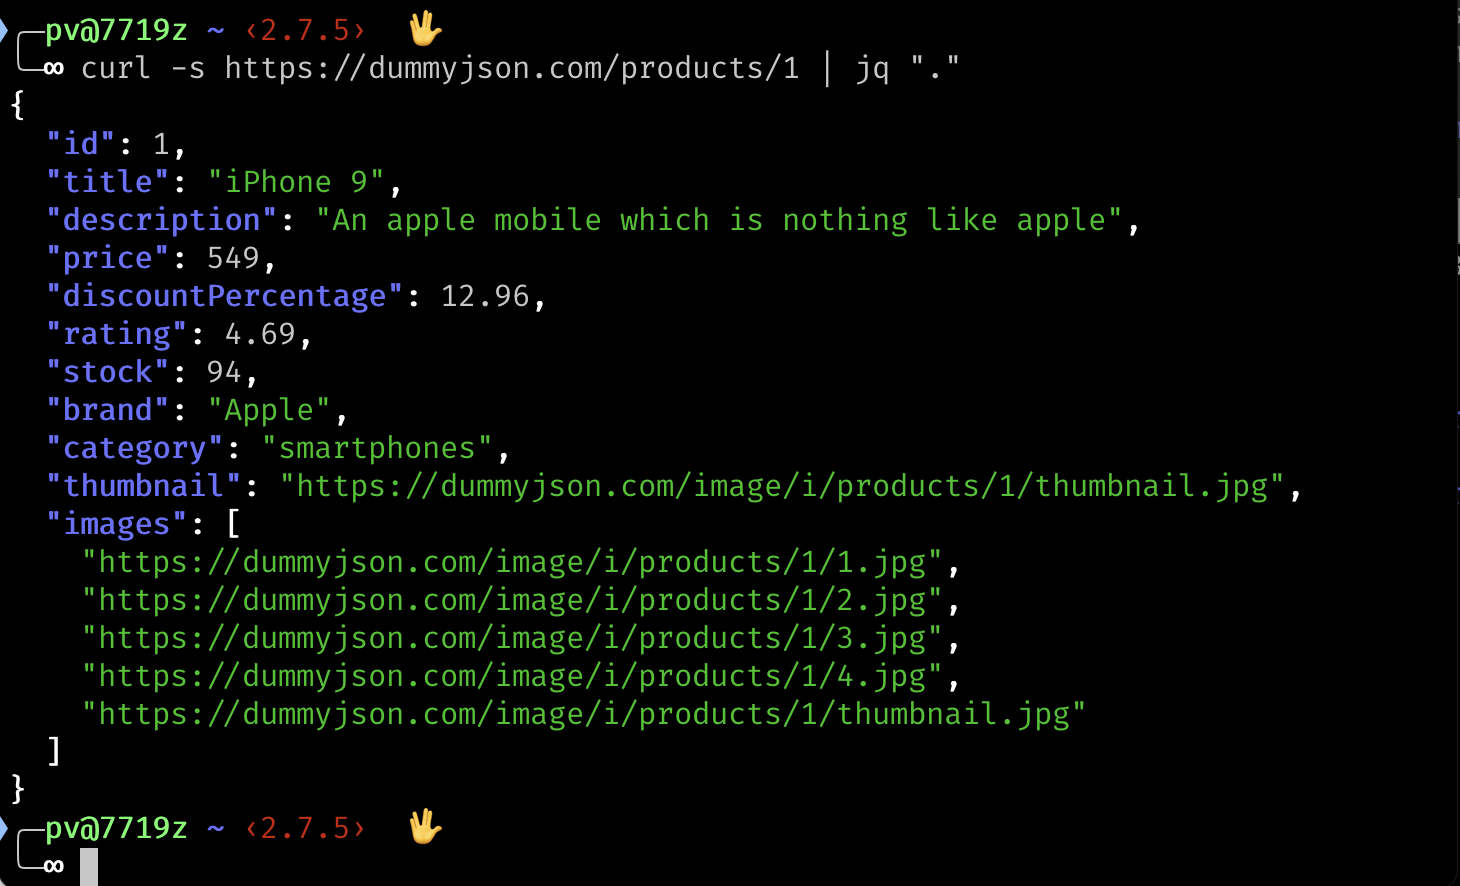
Now it’s easier to read the JSON from the API, because it’s formatted nicely and has syntax highlighting.
Using the -w Flag
curl also has a -w flag that can be used to extract specific information from the URL. Variables are passed to -w telling it what you want to see.
For example, it’s possible to extract just the HTTP status code (e.g., 200) like this:
curl -o /dev/null -s -w "%{http_code}" https://example.com/Explanation:
-o /dev/null— discard the default output-s— use silent mode to hide unnecessary output-w "%{http_code}"— print the HTTP status code
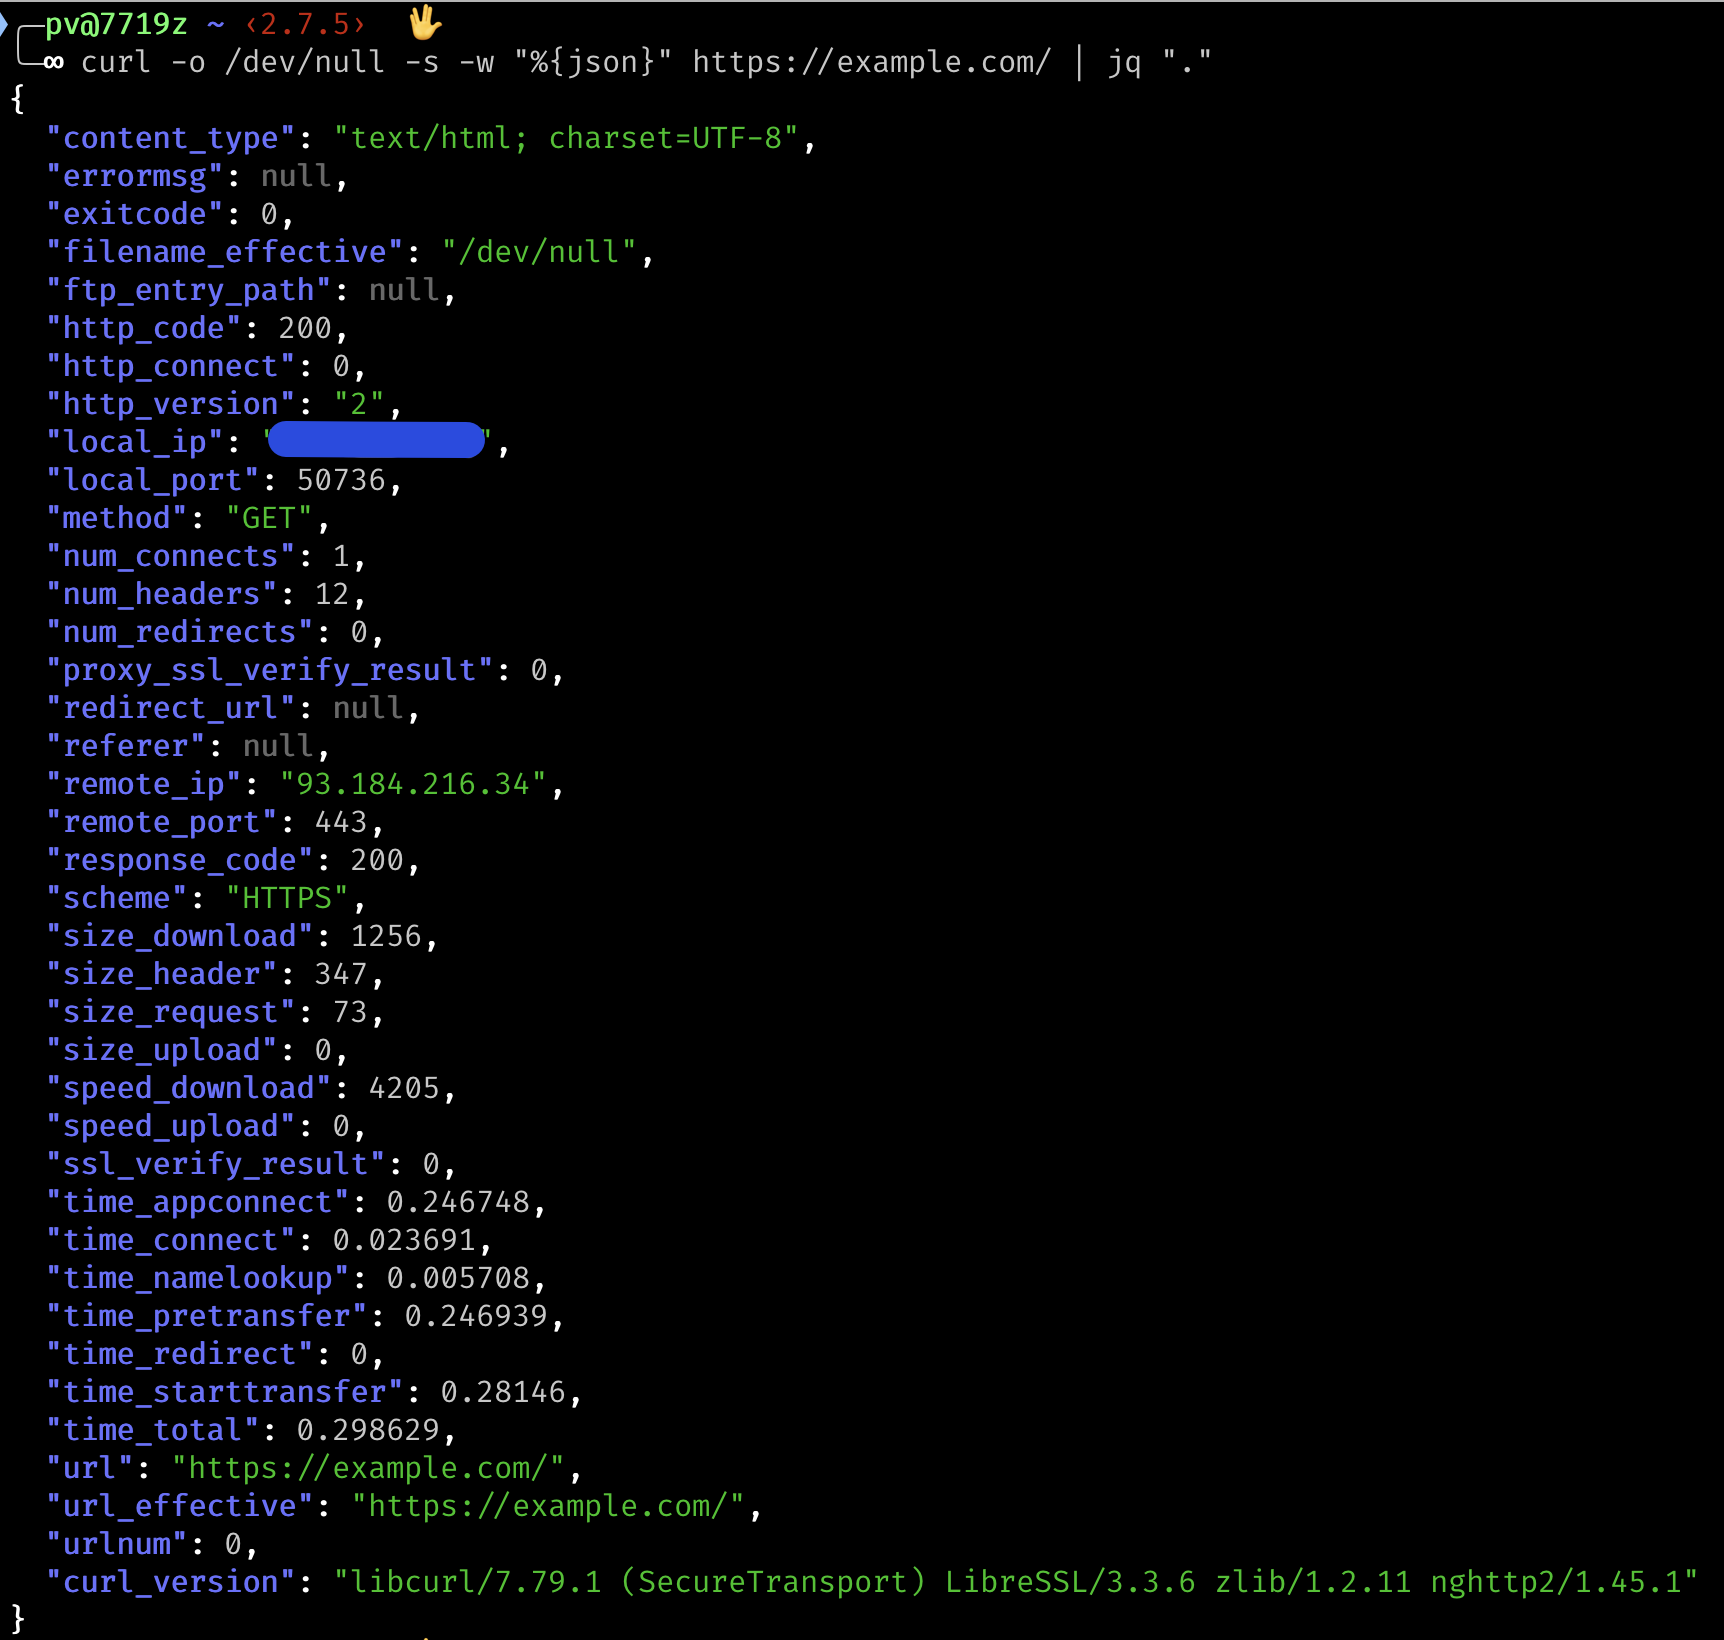
Another useful variable is named json. You can use it to get information about the request in machine-readable JSON format, which can then be piped into other scripts:
curl -o /dev/null -s -w "%{json}" https://example.com/It can be piped into jq to make it easier to read:
curl -o /dev/null -s -w "%{json}" https://example.com/ | jq "."Here’s what the JSON output of curl looks like:
Another variable is redirect_url:
curl -o /dev/null -s -w "%{redirect_url}" https://google.com/That will print out the destination of the redirect. In the above example, it will print out https://www.google.com/, because Google will do a redirect to the www version.
To learn more about the available variables, type man curl in a terminal and look for the section on --write-out (-w for short).
Checking Server Response Time with curl
There’s a curl variable named time_total that can tell you how long the operation lasted. Here’s the syntax:
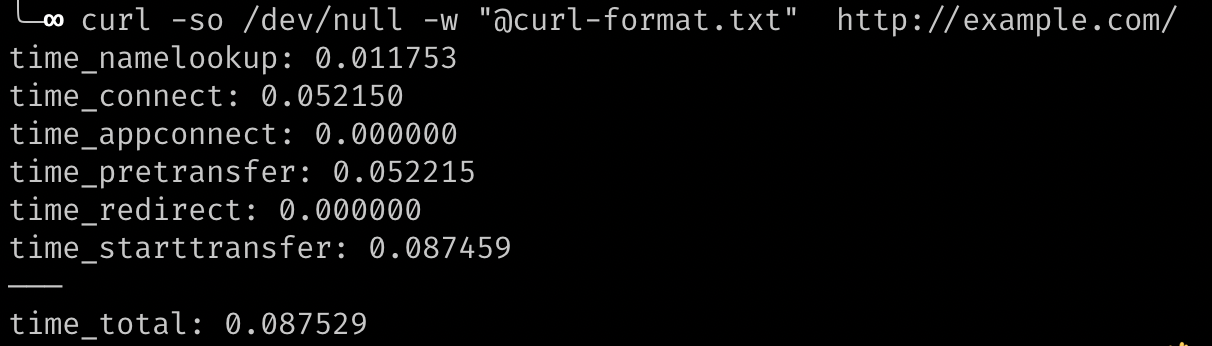
curl -so /dev/null -w %{time_total} https://example.com/You can look up multiple, related variables by creating a text file at curl-format.txt with the following contents:
time_namelookup: %{time_namelookup}\n
time_connect: %{time_connect}\n
time_appconnect: %{time_appconnect}\n
time_pretransfer: %{time_pretransfer}\n
time_redirect: %{time_redirect}\n
time_starttransfer: %{time_starttransfer}\n
———\n
time_total: %{time_total}\n
Then make the curl request like this:
curl -so /dev/null -w "@curl-format.txt" http://example.com/It will print out out the timing information like this:
A similar method is mentioned in this Time to First Byte post:
curl -w "\n \
    Connect time: %{time_connect}\n \
    Time to first byte: %{time_starttransfer}\n \
    Total time: %{time_total} \n" \
    -so /dev/null https://example.com/
Cloudflare’s blog has another interesting tip. Create (or edit) a file at ~/.curlrc and add the following line:
-w "dnslookup: %{time_namelookup} | connect: %{time_connect} | appconnect: %{time_appconnect} | pretransfer: %{time_pretransfer} | starttransfer: %{time_starttransfer} | total: %{time_total} | size: %{size_download}\n"(See this page for other things that can be done with a .curlrc file.)
You can then get the timing information from a simpler curl command like this:
curl -so /dev/null https://example.com/Here’s the output:

Using curl with grep to Search for Text
Another interesting thing that you can do with curl is quickly search for text in the raw HTML of a webpage.
In this example, we’ll use another command called grep, which searches for text.
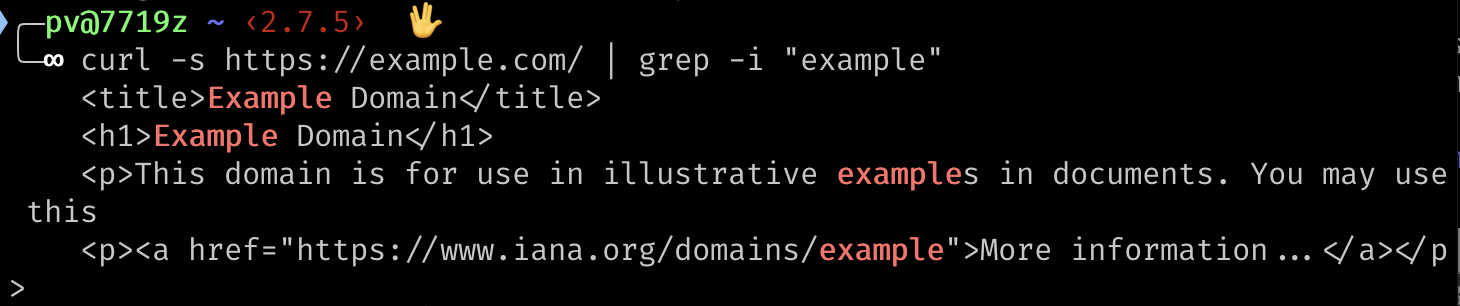
We’ll fetch the URL https://example.com/ and search for all the lines that contain the word “example”.
Here’s the command:
curl -s https://example.com/ | grep -i "example"Instead of piping the output into jq, this time we’re piping it into grep. The -i flag means to do a case-insensitive search, and "example" is the text that we’re searching for.
Here’s the output, showing the matches in red:
Monitoring Text or Links on a Web Page with Automation
If you want to regularly scan multiple Web pages for links to your site (for example, to see if they are removed), you can use a regularly-scheduled shell script.
This tutorial will go off topic if it goes too far into shell scripting, but I’ll post a quick example here.
Any command that you can run in the terminal can be put into a file and run as part of a larger program. Here’s an example of using curl to fetch a list of URLs and search them for specific text.
It’s a very rough example — the main point is just to give an idea of what is possible from a quick script.
#!/usr/bin/env bash

# The URLs of the pages that you want to search, one per line:
URLS=(
    https://example.com/
    https://example.com/whatever/
    https://example.com/something/
)

# The text you want to search for.
# It could be your domain name or any text.
SEARCH_STRING='some text'

# This loops over the URLs.
for url in "${URLS[@]}"; do
    echo "crawling $url"

    # curl extracts the HTML into a variable here.
    html=$(curl -s "$url")

    # If the search string is found, print out a message.
    if [[ $html == *"$SEARCH_STRING"* ]]; then
        echo "found link on $url"
    else
        echo "MISSING link on $url"
    fi
    echo "-------"
done
In the above script, the $() syntax is called command substitution. The command inside the parentheses is replaced with the value of the command’s output.
To run the shell script, put it in a file named scraper.sh and run chmod on it to make it executable:
chmod +x scraper.shThen run it like this:
./scraper.shA shell script like that can be run on a regular schedule using a cron job on Linux (including WSL on Windows) or launchd on Mac.
For more serious scraping jobs, I’d use Python or JavaScript/TypeScript, but I’ll cover that in another tutorial. The script above is just meant to prompt ideas for quick tasks that can be accomplished with a few lines of bash code.
If you’re curious about shell scripting, you might be interested in the tutorial on how to write a broken link checker with Lynx and curl.