Deploy Django on Fly.io with Poetry and Neon
This is a quick guide on how to deploy a Django site on Fly.io with Poetry and Neon Postgres. It assumes that you already know how to build a site with Django.
If you have any questions or encounter any issues, please leave a comment at the bottom. If you include your email address, I’ll try to help.
Prerequisites
You should have Poetry installed. See the installation instructions for your platform.
You’ll also need to install the Fly CLI (flyctl) and to have a Fly account.
I’m using Python 3.13, but any recent version of Python should work.
Be sure to create your local Postgres database too. Example:
psql postgres -U postgres
postgres=# CREATE DATABASE my_project_dev;
(This is a guide on how to deploy a Django site on Fly with Poetry, so I’m assuming that you already know how to get your Django site running locally.)
Creating the Project
I’ll walk through creating a minimal working Django project so that you can see how the project is structured for the deploy commands and what dependencies are needed.
poetry init --no-interactionpoetry add django dj_database_url gunicorn psycopg2 'whitenoise[brotli]'
# dev dependencies
poetry add --group dev black mypy flake8 isortIf you’re using VS Code (or similar) and it detects the virtual environment, activate it.
Open a terminal and check the location of the Python interpreter with this command:
which pythonYou should see a path that includes .venv relative to the current directory, like this:
/path/to/current_project/.venv/bin/pythonIf you don’t see that it’s using the Python installation in your local .venv directory, activate the virtual environment with this command:
poetry shellOR you can stay outside of the virtual environment and prefix all of your commands that need the virtual environment with poetry run, for example: poetry run python manage.py migrate.
I run commands to manage my project when I’m in the virtual environment, but run poetry commands and flyctl commands outside of the virtual environment.
Building the Django Site
Start your project, changing my_project to your project’s name, and don’t forget the period at the end of the line:
django-admin startproject my_project .Open the settings.py file and add the following changes:
DATABASES = {
    "default": dj_database_url.config(
        default=get_env_var("DATABASE_URL"),
        conn_max_age=600,
        conn_health_checks=True
    )
}
Be sure to import dj_database_url at the top of the file:
import dj_database_urlAdd whitenoise to the MIDDLEWARE list right after the security middleware:
MIDDLEWARE = [
    "django.middleware.security.SecurityMiddleware",
    "whitenoise.middleware.WhiteNoiseMiddleware",
    "django.contrib.sessions.middleware.SessionMiddleware",
    "django.middleware.common.CommonMiddleware",
    "django.middleware.csrf.CsrfViewMiddleware",
    "django.contrib.auth.middleware.AuthenticationMiddleware",
    "django.contrib.messages.middleware.MessageMiddleware",
    "django.middleware.clickjacking.XFrameOptionsMiddleware",
]
Add whitenoise to the INSTALLED_APPS list:
INSTALLED_APPS = [
    "django.contrib.admin",
    "django.contrib.auth",
    "django.contrib.contenttypes",
    "django.contrib.sessions",
    "django.contrib.messages",
    "whitenoise.runserver_nostatic",  # <- add this line
    "django.contrib.staticfiles",
    # ... your apps here...
]
Configure your static files:
STATIC_ROOT = BASE_DIR / "staticfiles"
if not DEBUG:
    STATICFILES_STORAGE = "whitenoise.storage.CompressedManifestStaticFilesStorage"
See the whitenoise docs for more information on configuring whitenoise.
Also, your local terminal should have these environment variables set:
DEBUG=True
SECRET_KEY='insecure-local-key'
DATABASE_URL=postgresql://postgres:postgres@localhost:5432/my_project_dev
I put those in a file called .env in my project directory and use a dotenv plugin for ohmyzsh that auto-loads the file into the environment when I cd into the project directory.
For production, the necessary environment variables will be set in the Fly.io dashboard.
The Fly secrets won’t be available to the build container, so you have to do a workaround. I put the production database connection string in a file named .env-production. Then I load that in a deploy script (described below). To follow along, create a file named .env-production and put the production database connection string in it like this:
# Use the production database connection string from the Neon.tech dashboard, explained below.
DATABASE_URL=postgresql://username:password@subdomain.us-west-2.aws.neon.tech/neondb?sslmode=require
Make sure all .env files are in the .gitignore file. If you don’t already have a .gitignore file, create one and add the following lines:
.env*
.venv/
node_modules/
Also put those lines in the .dockerignore file that the flyctl command created.
At the top of the settings.py file, import os:
import osThen change the lines that assign the SECRET_KEY and DEBUG variables to this:
SECRET_KEY = os.environ["SECRET_KEY"]  # crash if not found
DEBUG = bool(os.environ.get("DEBUG", False))
Deployment
To create your app on Fly.io, run this command:
flyctl launch --no-deployThere will be output something like this:
Scanning source code
Detected a Django app
Creating app in /Users/username/code/django_site
We're about to launch your Django app on Fly.io. Here's what you're getting:

Organization: Personal                  (fly launch defaults to the personal org)
Name:         django-site               (derived from your directory name)
Region:       San Jose, California (US) (this is the fastest region for you)
App Machines: shared-cpu-1x, 1GB RAM    (most apps need about 1GB of RAM)
Postgres:     <none>                    (not requested)
Redis:        <none>                    (not requested)
Tigris:       <none>                    (not requested)

? Do you want to tweak these settings before proceeding? (y/N)
Enter “y” to customize the settings.
For this simple demo site, I chose 512MB of RAM and declined the other options. (At the time of writing this, the options were: Postgres, Redis, Tigris, Sentry.)
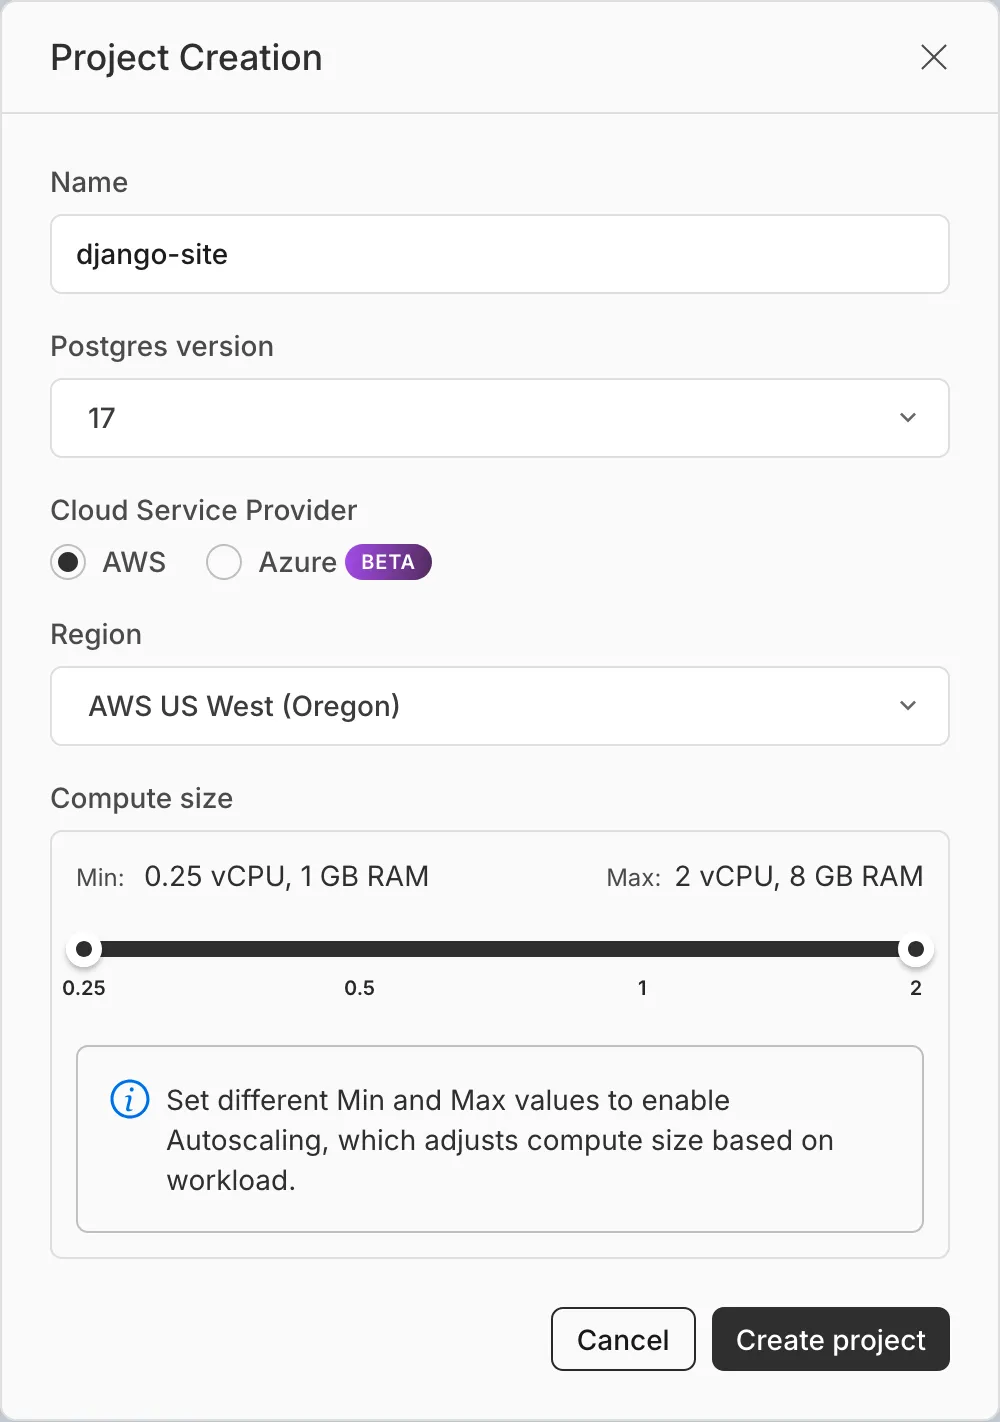
Register an account on Neon.tech and create a database if you haven’t done that already. Example settings are shown in the screenshot below.
Copy the Postgres database connection string and add it as a secret in Fly.io named DATABASE_URL. The value of that secret should look something like this:
postgresql://username:password@subdomain.us-west-2.aws.neon.tech/neondb?sslmode=requireThat connection string should also be put in the .env-production file (mentioned earlier).
Additional Django Configuration
Add the host for your production site to the ALLOWED_HOSTS list. My app on Fly.io is called django-site.fly.dev, so my line looks like this:
ALLOWED_HOSTS = [
    "localhost",
    "127.0.0.1",

    # Add the host for your production site here. It will be different than
    # mine.
    "django-site.fly.dev"
]
For forms to work, be sure to add your live host to a CSRF_TRUSTED_ORIGINS list in the settings.py file:
CSRF_TRUSTED_ORIGINS = [
    # Your URL will be different.
    "https://django-site.fly.dev"
]
Deploy
Look at the fly.toml file that the flyctl command created. Read the comments in my file here for more details:
# Your app name will be different.
app = 'django-site'

# Your primary region might be different.
primary_region = 'sjc'
console_command = '/code/manage.py shell'

[build]

# This section might have been automatically created, but if not, add it
# manually so that migrations run on deploy.
[deploy]
  release_command = "python manage.py migrate --noinput"

[env]
  PORT = '8000'

[http_service]
  internal_port = 8000
  force_https = true
  auto_stop_machines = 'stop'
  auto_start_machines = true
  # I set the min_machines_running to 1 so that it stays up all the time.
  min_machines_running = 1
  processes = ['app']

[[vm]]
  # If you chose different specs for your app, this section might look
  # different.
  memory = '512mb'
  cpu_kind = 'shared'
  cpus = 1

[[statics]]
  guest_path = '/code/static'
  url_prefix = '/static/'
Here is the Dockerfile that flyctl created:
ARG PYTHON_VERSION=3.13-slim

FROM python:${PYTHON_VERSION}

ENV PYTHONDONTWRITEBYTECODE 1
ENV PYTHONUNBUFFERED 1

RUN mkdir -p /code

WORKDIR /code

RUN pip install poetry
COPY pyproject.toml poetry.lock /code/
RUN poetry config virtualenvs.create false
RUN poetry install --only main --no-root --no-interaction
COPY . /code

EXPOSE 8000

CMD ["gunicorn","--bind",":8000","--workers","2","my_project.wsgi"]
I edited the Dockerfile to install Node.js and increase the Debian version from 11 (Bullseye) to 12 (Bookworm).
ARG PYTHON_VERSION=3.13-bookworm

FROM python:${PYTHON_VERSION}

ENV PYTHONDONTWRITEBYTECODE 1
ENV PYTHONUNBUFFERED 1

RUN apt-get update && apt-get install -y \
    libpq-dev \
    gcc \
    software-properties-common \
    npm \
    curl \
    vim \
    && rm -rf /var/lib/apt/lists/*

# Install Node.js version 22.
RUN npm install npm@latest -g && \
    npm install n -g && \
    n 22

WORKDIR /code

# Change `pnpm-lock.yaml` to `package-lock.json` if you use npm. If you use Yarn
# or something else, change it accordingly.
COPY package.json pnpm-lock.yaml /code/
# I'm using pnpm, but change these lines if you use npm or yarn.
RUN npm install -g pnpm && pnpm install

RUN pip install poetry
COPY pyproject.toml poetry.lock /code/
RUN poetry config virtualenvs.create false
RUN poetry install --only main --no-root --no-interaction
COPY . /code

# The build will fail if this env var doesn't exist. It will be replaced on the
# production server if `DATABASE_URL` is set as a secret in the Fly dashboard.
ENV SECRET_KEY="this-will-be-replaced-after-the-build"

# For more information on how to get secret env vars into the build, see this:
# https://fly.io/docs/apps/build-secrets/
RUN --mount=type=secret,id=DATABASE_URL \
    DATABASE_URL="$(cat /run/secrets/DATABASE_URL)" \
    python manage.py collectstatic --noinput

EXPOSE 8000

CMD ["gunicorn","--bind",":8000","--workers","2","my_project.wsgi"]
Create a file named deploy.sh and add this code to it:
#!/usr/bin/env bash

set -e

# This file contains production settings, but the file stays on the local
# computer.
source .env-production

fly deploy \
    --build-secret DATABASE_URL=$DATABASE_URL
Make the file executable:
chmod +x deploy.shThen to deploy it run the shell script like this:
./deploy.shI put a “deploy” script in package.json:
"scripts": {
    "deploy:prod": "./deploy.sh"
}
Then I can deploy like this:
pnpm deploy:prodI usually put the deploy.sh script in a directory named scripts but it can go wherever makes sense for the project.
You can also set up Fly to deploy automatically from something like Github Actions, which might be the topic of a future guide.
If you notice any problems with the instructions above, please click on one of the faces below and leave a comment.