How HTML Works
This section of the tutorial explains how HTML works.
What Is HTML?
HTML is a simple language that specifies how a document (like a Web page) is structured.
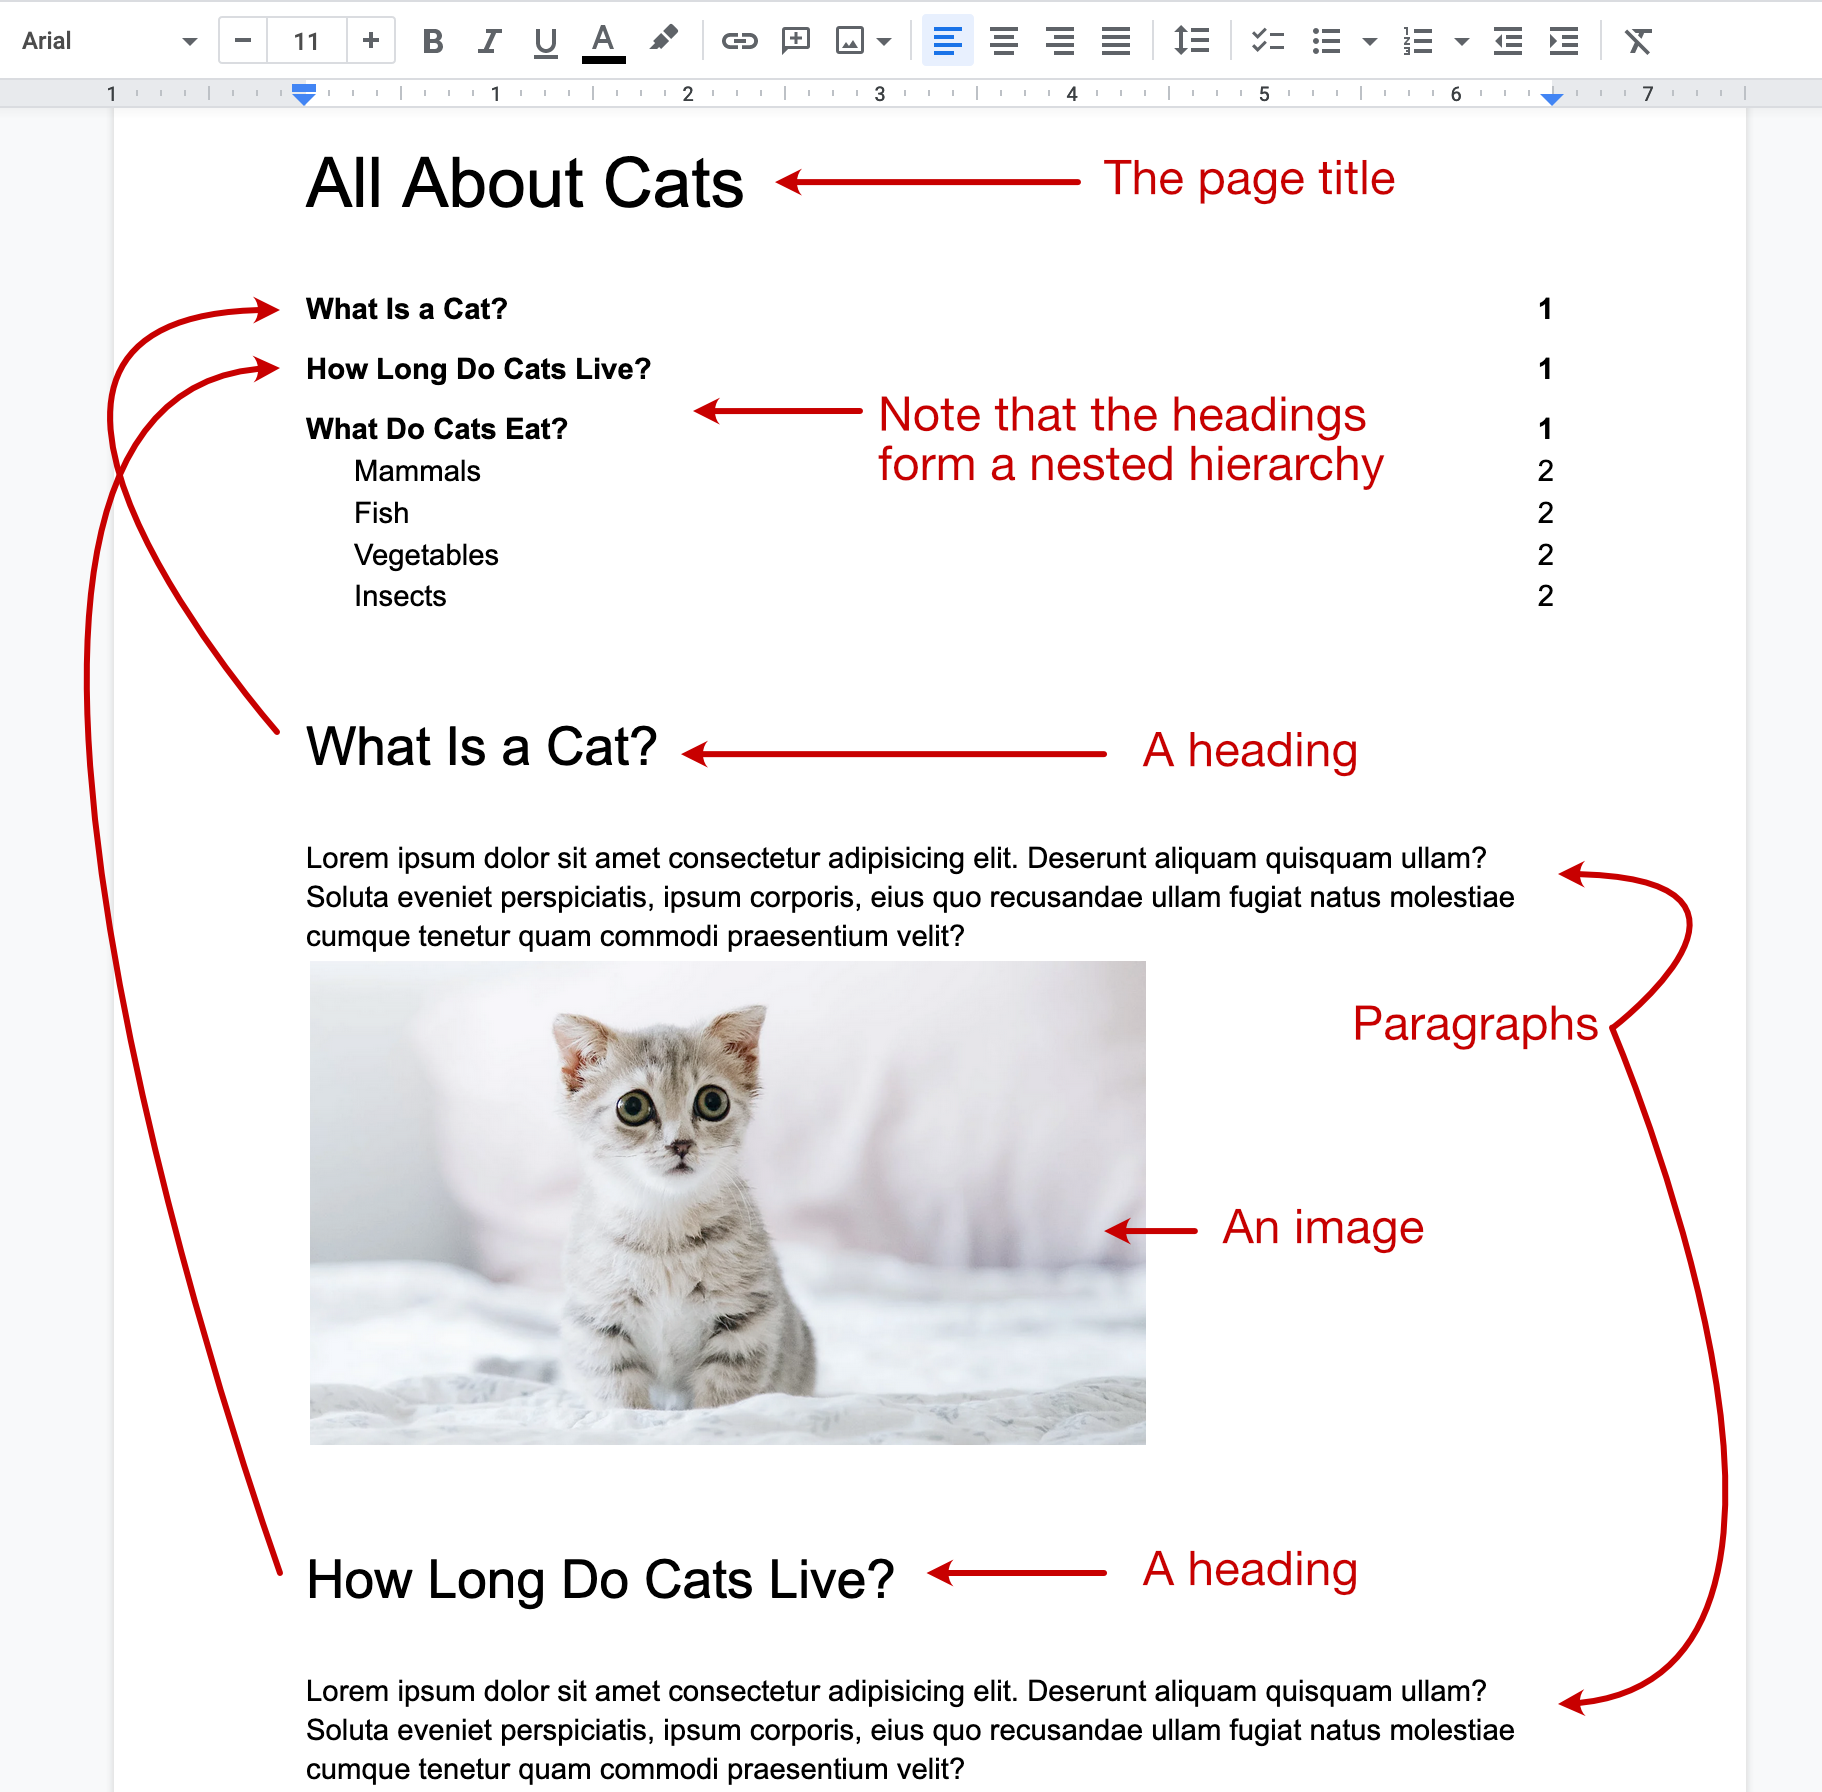
Before looking at some HTML code, let’s look at a word processing document. Notice how there is a hierarchical structure to the content, and there are different types of things on the page:
- A title
- Headers — along with a table of contents showing the hierarchical structure of the headers
- Paragraphs
- An image
Here’s the sample document:
Word processors usually have an editor bar that has various buttons for controlling the formatting.
With HTML, the end goal is similar (create a formatted document), but instead of a graphical interface for formatting the page, you use HTML tags.
What Are HTML Elements and Tags?
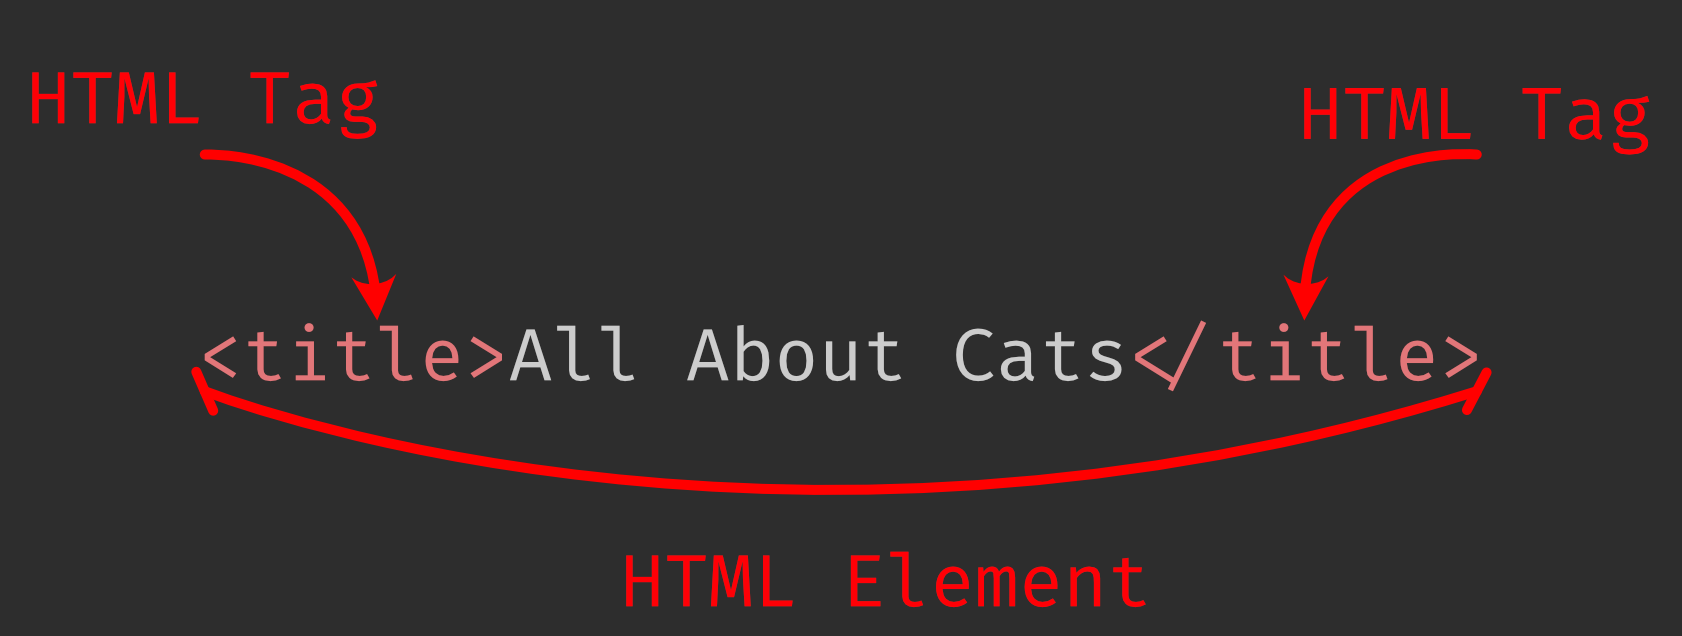
An HTML element is often a bit of text that is wrapped with tags in angle brackets like this:
<title>All About Cats</title>That’s the title of our word processing doc. To recreate it in HTML, we can wrap it with the name of what it is: a title. There are many pre-made HTML tags to choose from, and we can even create our own once we get into JavaScript.
The term “HTML tag” refers to the things wrapped in angle brackets. In the above example, the opening tag is <title> and the closing tag is </title>
The term “HTML element” refers to the entire thing: the opening tag, the closing tag, and the text in between.
To create paragraphs, text is wrapped with <p></p> tags like this:
<p>
  Lorem ipsum dolor sit amet consectetur adipisicing elit. Deserunt aliquam
  quisquam ullam? Soluta eveniet perspiciatis, ipsum corporis, eius quo
  recusandae ullam fugiat natus molestiae cumque tenetur quam commodi
  praesentium velit?
</p>
HTML ignores line breaks, so the text there is only wrapped to make it easier to read in the code editor without scrolling sideways.
Headings are created with six levels of heading tag: <h1> for the main heading(s) up to <h6> for the smallest sub-heading. Each heading corresponds to a level in the outline of your document.
For example, if you’re writing an article about cats, you might start with an outline something like this:
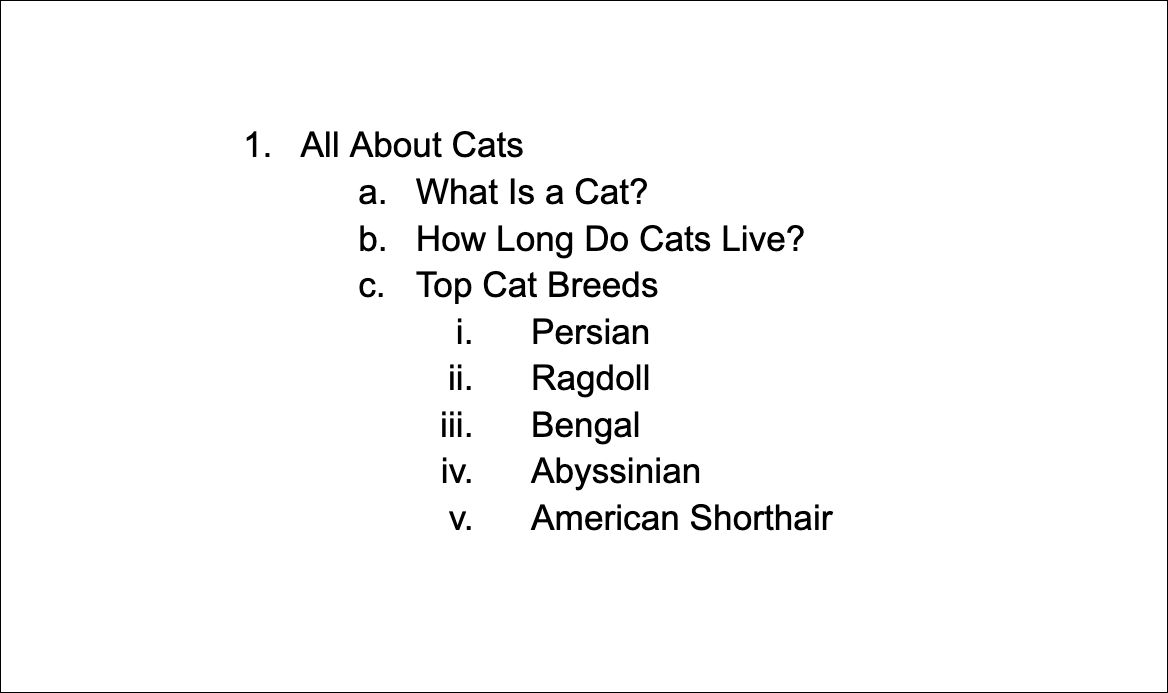
The main section would be the first header level (the <h1> tag in HTML). The direct sub-sections of the <h1> would have headers wrapped with the second header level (<h2>). The direct subsections of the <h2> headers would be wrapped with <h3>, and so on.
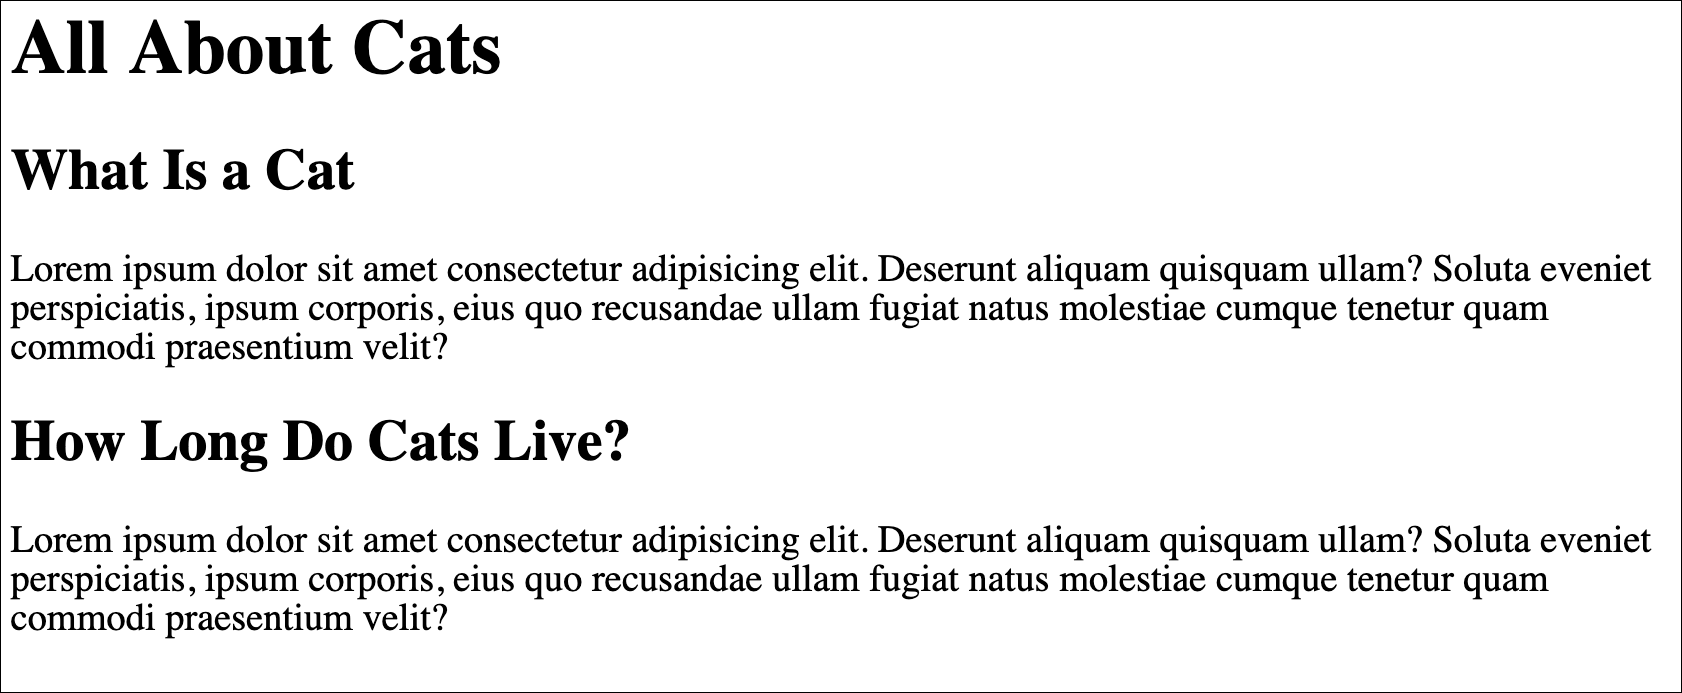
So the word processing example mentioned above, would be written out like this in HTML — one main header (<h1>), two sub-headers (<h2>), and two paragraphs (<p>):
<h1>All About Cats</h1>
<h2>What Is a Cat</h2>
<p>
  Lorem ipsum dolor sit amet consectetur adipisicing elit. Deserunt aliquam
  quisquam ullam? Soluta eveniet perspiciatis, ipsum corporis, eius quo
  recusandae ullam fugiat natus molestiae cumque tenetur quam commodi
  praesentium velit?
</p>
<h2>How Long Do Cats Live?</h2>
<p>
  Lorem ipsum dolor sit amet consectetur adipisicing elit. Deserunt aliquam
  quisquam ullam? Soluta eveniet perspiciatis, ipsum corporis, eius quo
  recusandae ullam fugiat natus molestiae cumque tenetur quam commodi
  praesentium velit?
</p>
To test it out, paste the above HTML in a file named cats.html and then open the file with your browser. (I recommend Firefox, because it will show you HTML errors.)
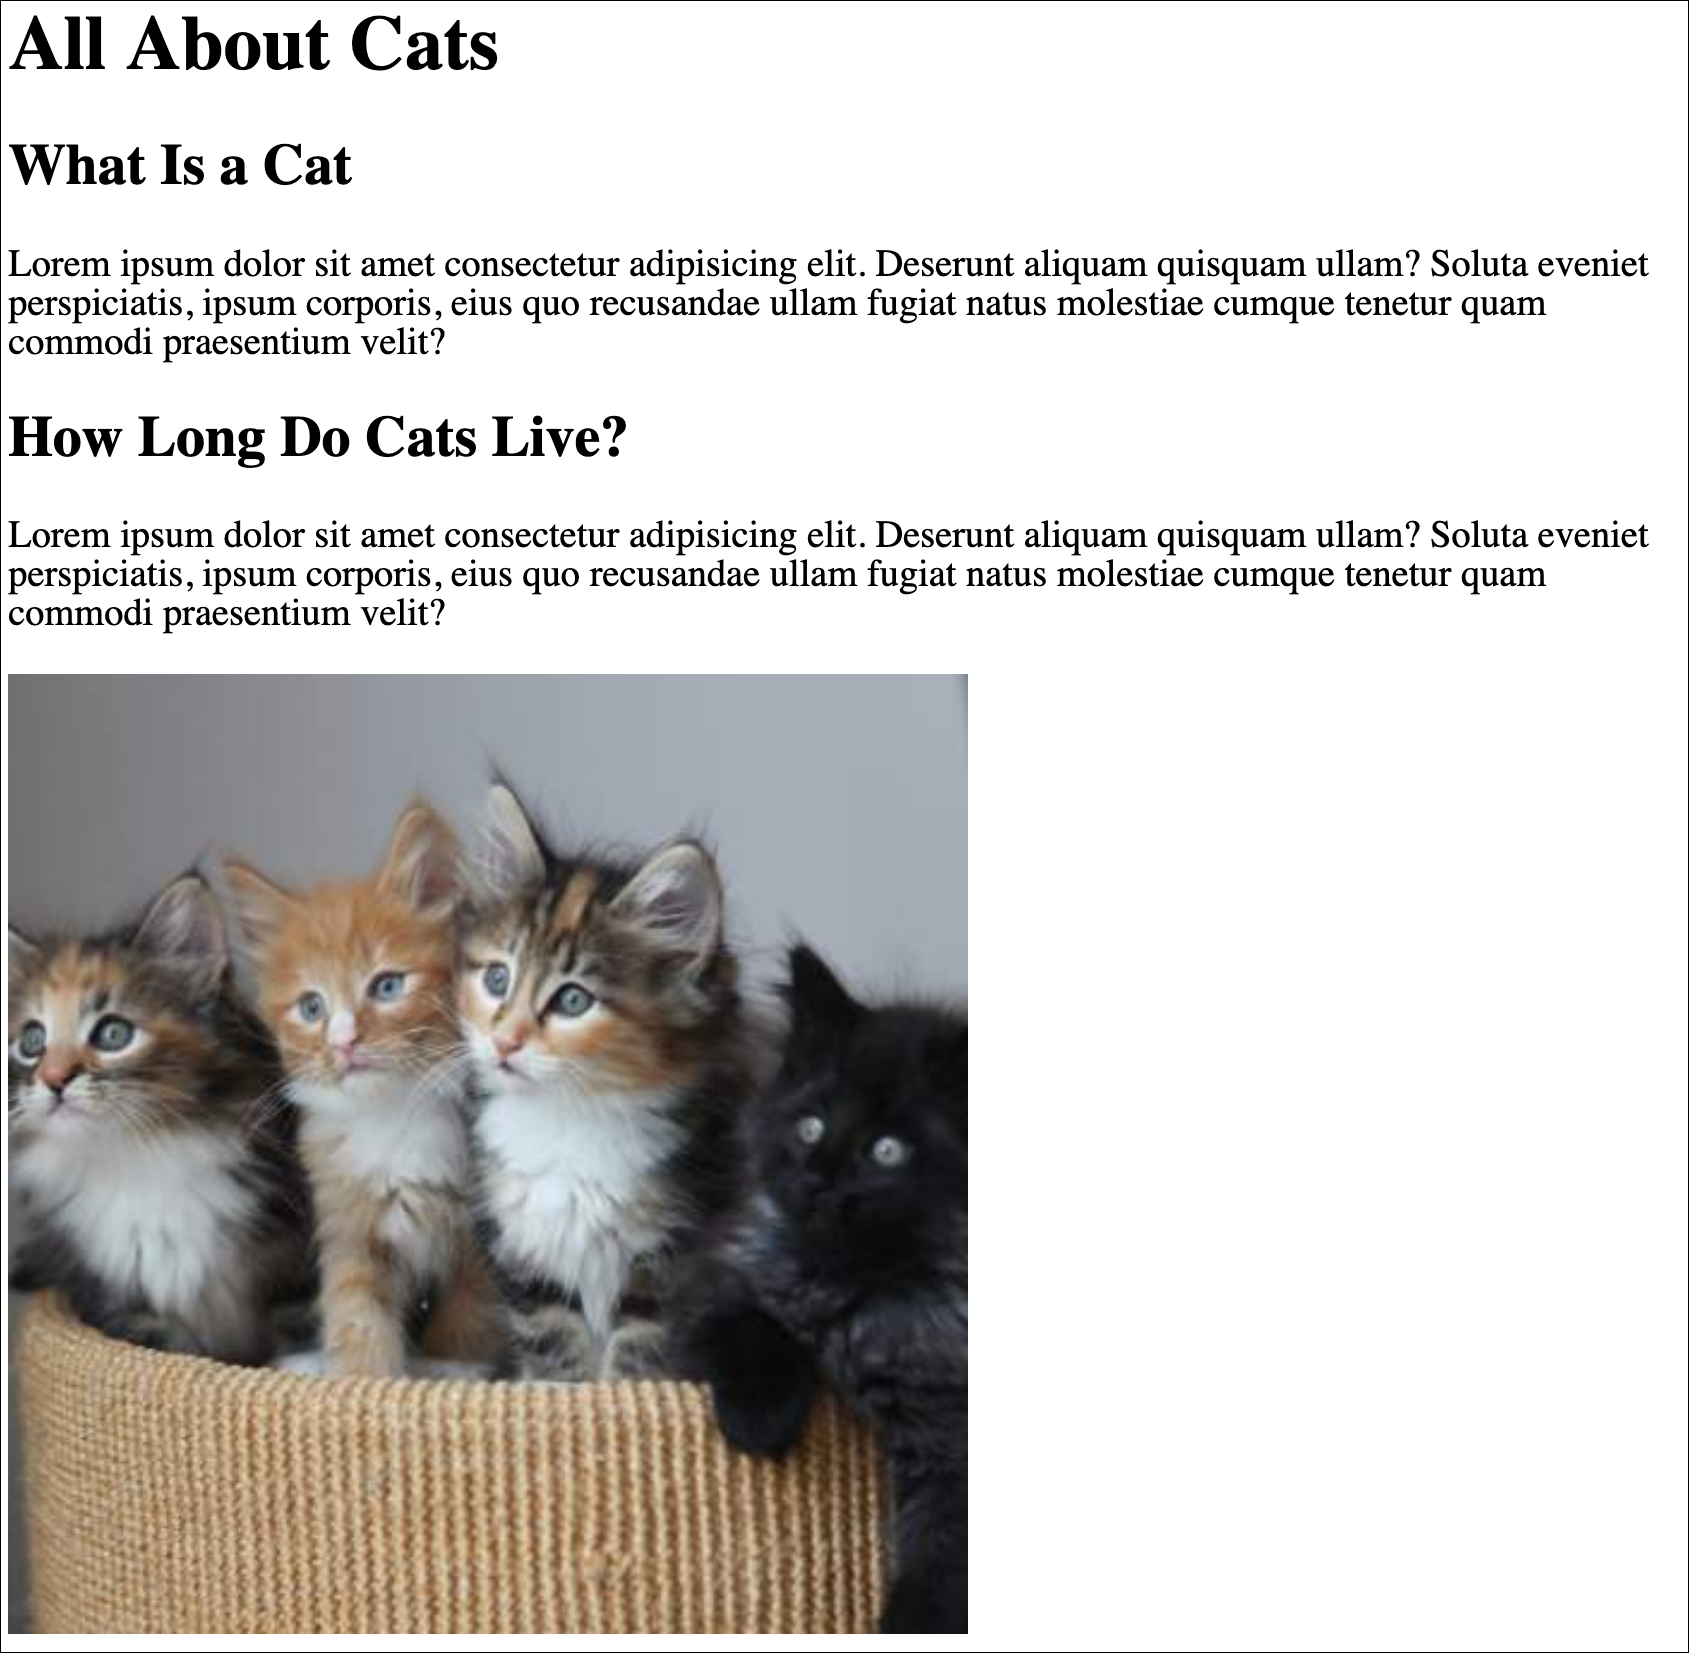
You should see something like this:
HTML Attributes
HTML tags can also contain extra information, called attributes.
To demonstrate attributes, we’ll add an image to our HTML document.
Add this line to the bottom of your cats.html file, and then reload the browser tab:
<img src="https://placekitten.com/400/400" />It should display a cat picture, something like this:
Notice how the image tag (<img>) doesn’t have a closing tag (it closes itself with a forward slash), and it has an extra thing there named src:
<img src="https://placekitten.com/400/400" />src is called an attribute. Different kinds of HTML tags can have different attributes attached to them. In the case of images, you generally want to indicate the source (src) of the image. In this example, it’s loading the image found at https://placekitten.com/400/400.
It’s considered good practice to always include an alt attribute on images, because screen readers and search engines will use it. The attribute provides an alternate way to represent the image. Add a description of the image in an alt attribute like this:
<img src="https://placekitten.com/400/400" alt="Cats" />The page won’t visibly change after adding the alt text, but machines will be able to use it.
The HTML Wrapper
To create a full HTML document, we need to add a few more things.
The entire HTML document should be wrapped with <html></html> tags. Within those there should also be a <head></head> and a <body></body> section.
And at the top of the document should be a line that specifies the version of HTML. For HTML 5, the line is <!DOCTYPE html>.
The <head> section is for machine-readable metadata that is used by browsers and bots.
The <body> section is for your HTML that displays on the page.
The basic wrapper looks like this:
<!doctype html>
<html>
  <head>
    <!-- Metadata about the document goes in the head. -->
  </head>
  <body>
    <!-- The visible part of your document goes in the body. -->
  </body>
</html>
(If you want to write comments in your HTML code, wrap text with <!-- and -->, and the browser will ignore it.)
Put the HTML code that you had from before into the <body></body> tags, and put a <title> element inside of the <head></head> section like this:
<!doctype html>
<html>
  <head>
    <title>All About Cats</title>
  </head>
  <body>
    <h1>All About Cats</h1>
    <h2>What Is a Cat?</h2>
    <p>
      Lorem ipsum dolor sit amet consectetur adipisicing elit. Deserunt aliquam
      quisquam ullam? Soluta eveniet perspiciatis, ipsum corporis, eius quo
      recusandae ullam fugiat natus molestiae cumque tenetur quam commodi
      praesentium velit?
    </p>
    <h2>How Long Do Cats Live?</h2>
    <p>
      Lorem ipsum dolor sit amet consectetur adipisicing elit. Deserunt aliquam
      quisquam ullam? Soluta eveniet perspiciatis, ipsum corporis, eius quo
      recusandae ullam fugiat natus molestiae cumque tenetur quam commodi
      praesentium velit?
    </p>
    <img src="https://placekitten.com/400/400" alt="Cats" />
  </body>
</html>
Two more small things you can add are a lang="en" attribute to the opening <html> tag, and a <meta charset="UTF-8" /> tag to the <head> section like this:
<!doctype html>
<html lang="en">
  <head>
    <meta charset="UTF-8" />
    <title>All About Cats</title>
  </head>
  <body>
    <h1>All About Cats</h1>
    <h2>What Is a Cat?</h2>
    <p>
      Lorem ipsum dolor sit amet consectetur adipisicing elit. Deserunt aliquam
      quisquam ullam? Soluta eveniet perspiciatis, ipsum corporis, eius quo
      recusandae ullam fugiat natus molestiae cumque tenetur quam commodi
      praesentium velit?
    </p>
    <h2>How Long Do Cats Live?</h2>
    <p>
      Lorem ipsum dolor sit amet consectetur adipisicing elit. Deserunt aliquam
      quisquam ullam? Soluta eveniet perspiciatis, ipsum corporis, eius quo
      recusandae ullam fugiat natus molestiae cumque tenetur quam commodi
      praesentium velit?
    </p>
    <img src="https://placekitten.com/400/400" alt="Cats" />
  </body>
</html>
The lang attribute tells browsers and bots what language the page is in. The charset meta tag helps display characters correctly.
Reload the page in your browser, and look at tab at the top of your browser. The text within the <title> element should be displayed on the browser tab.
The <title> was put in the <head> section, because it’s metadata that doesn’t appear on the page itself.
Common HTML Tags
There are too many HTML tags to list in an introductory tutorial like this, but here are some of the most common ones:
<p>— paragraph<img>— an image where thesrcattribute points at the URL or path of the image to load<a>— an anchor or link where thehrefattribute points to the destination URL or path<ul>— unordered list<ol>— ordered list (numbered)<li>— a list item that can appear in an ordered or unordered list<blockquote>— contains a quoted block of text<code>— contains computer code<pre>— prints out the contents exactly as written, instead of ignoring line breaks and multiple spaces<em>— emphasized text (renders as italic by default)<strong>— strong text (renders as bold by default)<noscript>— whatever is inside will only display if JavaScript is turned off<form>— displays a form based on its child elements, like<input>and<button><div>— a block division or section of the page<span>— an inline section of the page
These tags are often found in the <head> section. These tags don’t directly change the document, though their contents can change the page.
<title>— the title of the page that should be displayed in the browser tab<meta>— metadata<script>— contains JavaScript or loads a JavaScript file (see our JavaScript tutorial)<style>— contains CSS (see our CSS tutorial)<link>— this is often used to load CSS files
Semantic HTML
One important thing to note is that HTML describes the structure of a document, not the design.
For example, when you are creating headings on the page and deciding which tag to use (<h1> vs. <h2> vs. <h3> etc.), the decision should be based on keeping the headings in the right order, where H2 should only be a child of H1, and H3 should only be a child of H2.
A common beginner mistake is to choose the HTML element based on font size or another aspect of how it looks. The HTML element should be chosen based on its meaning on the page.
The page design is modified with a different language called CSS. That will be covered in the next tutorial.
Takeaways
Here are some things from this section that you should remember:
- HTML describes the structure of the page, not the design. (The design is handled by another language, called CSS.)
- An HTML tag only specifies the meaning of the thing on the page: this is a header, this is a paragraph, this is an image, this is a list of things, etc.
- HTML tags can have attributes which add functionality to that part of the page. For example, an
<img>tag has asrcattribute that contains the URL of the image to load. - You don’t have to memorize a lot of HTML tags. You’ll become familiar with the common ones as you build a few websites.